

How to Convert Your WordPress Media Library to WebP and AVIF
Most WordPress media libraries are full of JPEGs and PNGs uploaded long before WebP or AVIF were an option. New uploads are the easy part. The back catalog is the hard part, and I had no interest in shipping it to a third-party service for re-encoding.
I built WebberZone Image Optimizer to do that conversion on your own server. It writes WebP and AVIF copies next to your originals and serves them through a <picture> element, so the browser picks the format it can read.
I used the bulk processing on ajaydsouza.comOpens in a new window. It compressed over 1,500 images spread over the past 20+ years and saved over 75 MB.
What you need
You need WordPress 6.6, PHP 7.4, and either Imagick or GD, which WordPress already needs to generate thumbnails.
WebP works on practically any current host. AVIF needs PHP 8.1+ with GD built against libavif, or Imagick with an AVIF delegate.
Install and activate
Go to Plugins → Add New Plugin, search for “WebberZone Image Optimizer”, then install and activate it.
Activation runs a capability probe. I have the plugin encode a small test image with each available backend and record which formats actually come back working, because an extension can claim support for a format it then fails to write.
Configure the General settings
Open Media → Image Optimizer. I’ll cover the four General tab settings that matter for a library conversion.
Formats to generate has two checkboxes: WebP and AVIF. Only WebP is ticked by default.
AVIF files are smaller but cost a few times more CPU to encode. If your server supports both, tick both, and each browser gets the smallest format it can read.
If the probe couldn’t encode a format, its label reads AVIF (not available on this server), or the WebP equivalent.
You can still tick the box. It won’t stick: the plugin strips any unsupported format when you save, since it would only queue work that always fails. If your host enables AVIF later, deactivate and reactivate the plugin to rerun the probe.
Convert new uploads is on by default and converts each image as it’s uploaded. If uploads start to drag after turning on AVIF, switch it off and new uploads go to the background queue instead.
Image sizes to convert is empty by default, which converts every size. If you narrow it, include the smallest and largest sizes. A format is withheld for an image when an edge size is missing.
Minimum saving (%) defaults to 5. Any optimized copy that isn’t at least that much smaller than its source is discarded, file by file. Since 1.1.0, a lossy copy that misses gets one retry at a lower quality first.
Image Optimizer Settings covers everything.
Run Bulk Optimize
Go to Media → Bulk Optimize and press Start optimizing. The plugin builds a queue from your library, then works through it in batches.
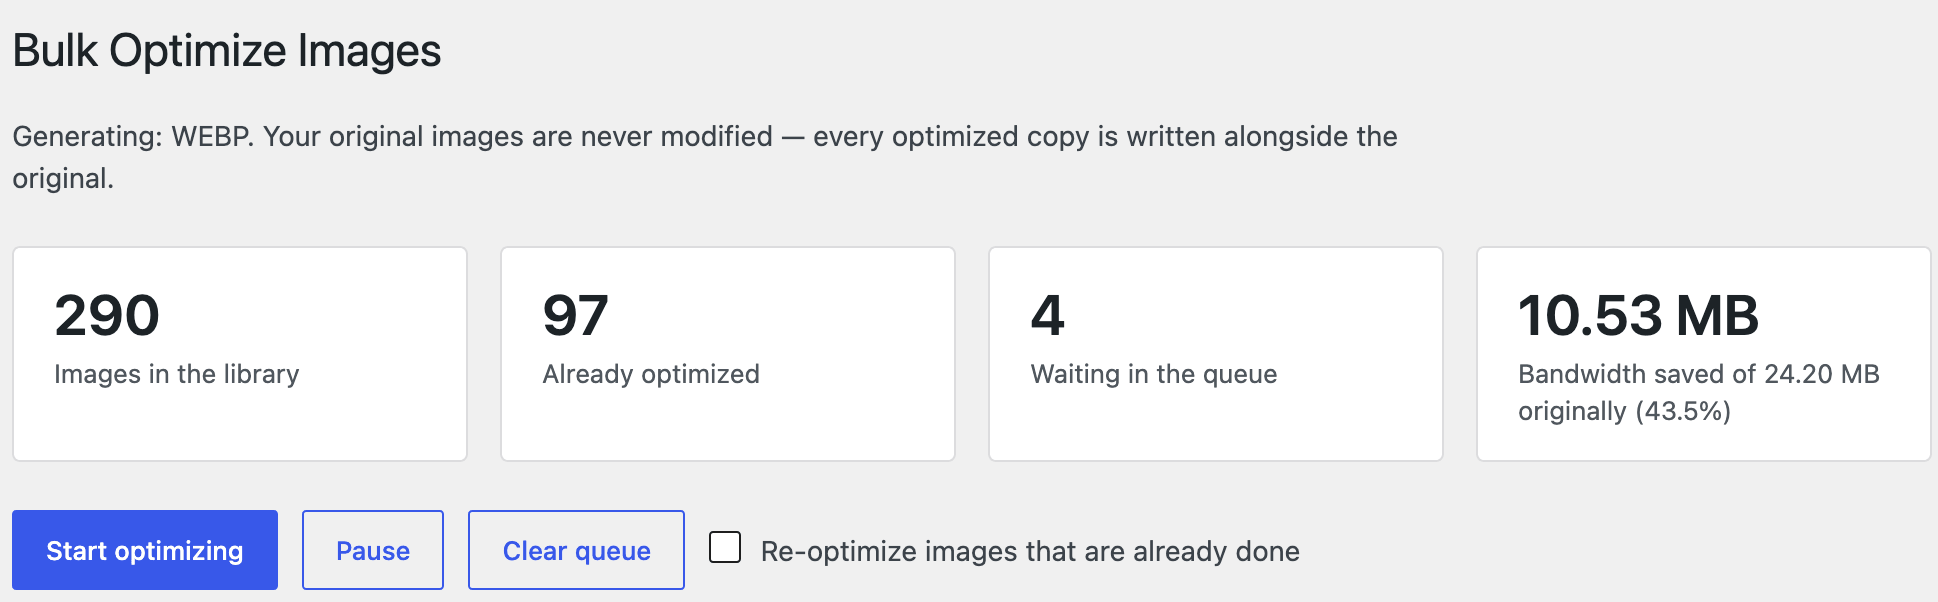
I built the queue into a database table so it survives interruptions. Close the tab, and nothing is lost. With Process the queue in the background on (the default), a WP-Cron worker carries on, and reopening the screen resumes where it stopped.
Pause stops the run. Clear queue drops waiting and in-progress images without touching those already optimized.
Images that fail three times are listed under Images that could not be optimized, with the reason. The Bulk Optimize guide covers the rest.
Verify delivery in devtools
I chose <picture> so every visitor gets identical HTML, and the browser makes the choice. That keeps page caches and CDNs correct.
To check it:
- Open a published post on the front end. Post previews are skipped, so don’t use one.
- Right-click an image and choose Inspect.
- Confirm the
<img>sits inside a<picture>with a<source>per format. - In the Network tab, filter by Img and reload. The Type column should show
aviforwebp.
With both formats enabled, the markup looks like this:
If you run a page cache, purge it once the bulk run finishes. Cached pages predate the optimized copies.
Troubleshooting
An image still served as a JPEG usually has one of three causes: it’s hosted on another domain, often after an import; an edge size missed the minimum saving; or your server can’t produce that format.
The Optimized column I added to Media → Library in list view shows which applies.
If the queue stops moving, Bulk Optimize shows a warning once a whole 15-minute window passes with no worker run, naming DISABLE_WP_CRON or a blocked loopback request as the likely cause. Run the queue manually with WP-CLI:
Wrapping up
Once the bulk run is done, new uploads keep the library current, and your originals stay exactly as they were. Deactivate the plugin and the site goes straight back to serving them.
WebberZone Image Optimizer is free. Install it from WordPress.orgOpens in a new window.
