WordPress block development: Building dynamic blocks
This tutorial is the fourth part of the WordPress block development series. The first three parts of the series covered creating a simple block using @wordpress/create-block. We then customised the block to display an inline notice/alert with customisable text.
In this tutorial, we will create a dynamic block. Unlike static blocks, dynamic blocks are rendered on the fly in the front-end. Static blocks use the information saved in the post content when a post is saved. However, this wouldn’t work for content that changes, such as a latest posts or popular posts block, since the post content doesn’t automatically update when you create a new post.
This is why the blocks within my plugins are dynamic.
If you haven’t already done so, before proceeding take a look at the first three tutorials as this tutorial assumes you now have a basic understanding of building a block.
There are two ways to create dynamic blocks. The original method is to use the render_callback argument when you register_block_type. The alternate method, which has been supported since WordPress v6.1, is to use the render property in block.json.
Let’s explore both methods. If you’re not familiar with registering a block or creating a block plugin, I recommend reading the first part of the series.
Method 1: Using render_callback
I’m currently using the first method to render my blocks’ content to support WordPress versions before 6.1. However, I plan to migrate to the second method over time as described below.
Step 1: Create a block
You can create a block using the @wordpress/create-block package before we proceed.
Step 2: Convert a static block to dynamic
To convert the static block into a dynamic block, you can modify the function that registers the block. The function register_block_type takes a second parameter $args which accepts an array of block type arguments. See WP_Block_Type::__construct() for information on accepted arguments.
/**
 * Registers the block using the metadata loaded from the `block.json` file.
 * Behind the scenes, it registers also all assets so they can be enqueued
 * through the block editor in the corresponding context.
 *
 * @see https://developer.wordpress.org/reference/functions/register_block_type/
 */
function wz_tutorial_dynamic_block_block_init() {
	register_block_type(
		__DIR__ . '/build',
		array(
			'render_callback' => 'wz_tutorial_dynamic_block_dynamic_callback',
		)
	);
}
add_action( 'init', 'wz_tutorial_dynamic_block_block_init' );

/**
 * Callback that renders the output of the dynamic block.
 */
function wz_tutorial_dynamic_block_dynamic_callback() {
	$output  = sprintf( '<p %s>', get_block_wrapper_attributes() );
	$output .= esc_html__( 'Example Dynamic Block – hello from a dynamic block using render_callback!', 'dynamic-block' );
	$output .= '</p>';

	return $output;
}
Let’s break this down:
- Lines 11-13 contain the
$argsarguments array. We only need to pass therender_callbackargument with the name of the functionwz_tutorial_dynamic_block_dynamic_callbackthat will render the output - Lines 21-27 are the function that renders the output. In the above example, the function outputs a single
<p>tag with our text. This will help us check if the dynamic function works. The functionget_block_wrapper attributes()generates a string of HTML attributes. Supported attributes currently arestyleandclass.
If you save the post and then view it on the front-end you’ll see the below output. You’ll recall from the first tutorial that the @wordpress/create-block package generates a block with a blue background and white text.

Method 2: Using render.php
WordPress 6.1 introduced the render property which passes the location of a PHP file which can process the code needed for the dynamic block.
Step 1: Create the block
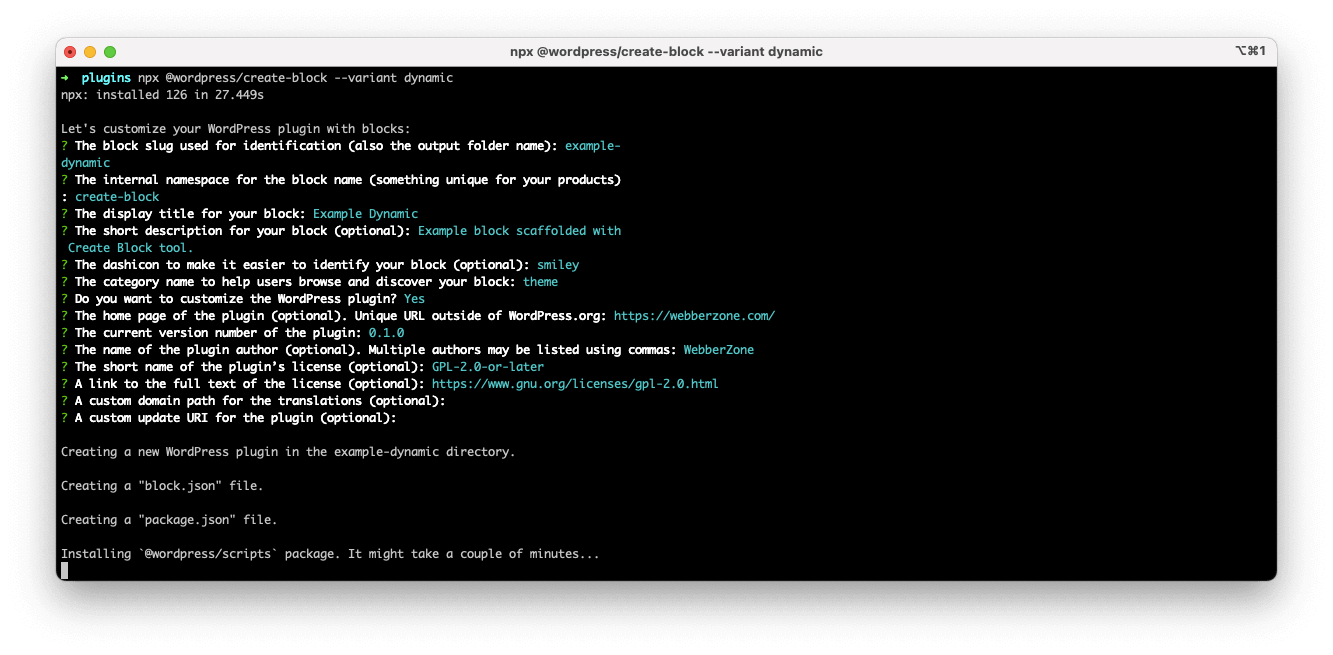
At the time of this tutorial, you can create a dynamic block by running the following code in Terminal the plugins folder:
npx @wordpress/create-block --variant dynamicFollow the prompts to customise the plugin. Once complete, you will have a WordPress plugin with the dynamic block feature ready to be activated. I called mine dynamic-block (Example Dynamic Block). The screenshot below shows the default answers.
npx @wordpress/create-block --variant dynamicStep 2: Update render.php
You can activate the plugin and navigate to the Edit post screen to insert the block called Example Dynamic Block. Save/publish this post and preview it in the front-end which will show you a block like this:

As you can see, this method is faster but you’ll be unable to support WordPress versions before v6.1. Also, one thing to bear in mind is that render_callback takes priority if that is passed to register_block_type().
Now that you have created your dynamic block, let’s continue to customise it.
Step 3: Update edit.js
While we do have a working dynamic block in the front-end, it’s important to give the user the same preview in the block editor as well. This is where the ServerSideRender component works its magic.
We first need to import the component. So, open up edit.js and add this line at the top as the second import statement.
import ServerSideRender from '@wordpress/server-side-render';Then let’s update the Edit() function that is exported. Our completed edit.js is as follows:
import { __ } from '@wordpress/i18n';

import ServerSideRender from '@wordpress/server-side-render';

import { useBlockProps } from '@wordpress/block-editor';

import { Disabled } from '@wordpress/components';

import metadata from './block.json';
import './editor.scss';

export default function Edit( { attributes, setAttributes } ) {
	const blockProps = useBlockProps( {
		className: 'wz-dynamic-block',
	} );

	return (
		<>
			<div { ...blockProps }>
				<Disabled>
					<ServerSideRender
						block={ metadata.name }
						skipBlockSupportAttributes
						attributes={ attributes }
					/>
				</Disabled>
			</div>
		</>
	);
}
Lines 20-23 use the ServerSideRender component which takes these three properties:
- block: which is the full name of our block as given in block.json. We pass it using
metadata.name. - skipBlockSupportAttributes: This was introduced in WordPress 6.2 and you should include this if you’re using the Block Supports feature which adds custom classes and styles and can result in duplication.
- attributes: pass the array of attributes which are in turn passed to the function being called by
render_callback.
I’ve also wrapped the ServerSideRender component with a Disabled component. This prevents inadvertent clicks on any links that are rendered in the output.
If you now refresh the Edit post screen you’ll see that the block editor has the same output as the front-end.
Step 4: Update the callback function to display posts using WP_Query
Let’s build a simple list of posts that uses WP_Query. This will take a series of attributes that we will configure in the next step. This is a shorter version of the Latest Posts core block.
function wz_tutorial_dynamic_block_recent_posts( $attributes ) {

	$args = array(
		'posts_per_page'      => $attributes['postsToShow'],
		'post_status'         => 'publish',
		'order'               => $attributes['order'],
		'orderby'             => $attributes['orderBy'],
		'ignore_sticky_posts' => true,
		'no_found_rows'       => true,
	);

	$query        = new WP_Query();
	$latest_posts = $query->query( $args );

	$li_html = '';

	foreach ( $latest_posts as $post ) {
		$post_link = esc_url( get_permalink( $post ) );
		$title     = get_the_title( $post );

		if ( ! $title ) {
			$title = __( '(no title)', 'dynamic-block' );
		}

		$li_html .= '<li>';

		$li_html .= sprintf(
			'<a class="dynamic-block-recent-posts__post-title" href="%1$s">%2$s</a>',
			esc_url( $post_link ),
			$title
		);

		$li_html .= '</li>';

	}

	$classes = array( 'dynamic-block-recent-posts' );

	$wrapper_attributes = get_block_wrapper_attributes( array( 'class' => implode( ' ', $classes ) ) );

	$heading = $attributes['showHeading'] ? $attributes['heading'] : '';

	return sprintf(
		'%1$s<ul %2$s>%3$s</ul>',
		$heading,
		$wrapper_attributes,
		$li_html
	);
}
The function above uses the $attributes variable which is an array containing all the block attributes. It selects a few of these and passes them to WP_Query to fetch the posts. The latest posts are then displayed in an unordered list.
You will also need to update the render_callback parameter of register_block_type to use the name of the function above. Alternatively, you could replace the contents of render.php with:
<?php
echo wz_tutorial_dynamic_block_recent_posts( $attributes );
Step 5: Add the attributes to block.json
Similar to the WordPress Block Development: Customising the Settings Sidebar tutorial, you need to add various attributes to block.json.
"attributes": {
	"postsToShow": {
		"type": "number",
		"default": 5
	},
	"heading": {
		"type": "string"
	},
	"showHeading": {
		"type": "boolean"
	},
	"order": {
		"type": "string",
		"default": "desc"
	},
	"orderBy": {
		"type": "string",
		"default": "date"
	}
},
Step 6: Add the settings to the sidebar
We can use InspectorControls to add some settings to the sidebar that will allow the user to modify the query.
<InspectorControls>
	<PanelBody
		title={ __( 'Settings', 'dynamic-block' ) }
		initialOpen={ true }
	>
		<PanelRow>
			<fieldset>
				<ToggleControl
					label={ __(
						'Show a heading before',
						'dynamic-block'
					) }
					help={
						showHeading
							? __(
									'Heading displayed',
									'dynamic-block'
								)
							: __(
									'No Heading displayed',
									'dynamic-block'
								)
					}
					checked={ showHeading }
					onChange={ toggleHeading }
				/>
			</fieldset>
		</PanelRow>
		{ showHeading && (
			<PanelRow>
				<fieldset>
					<TextControl
						label={ __( 'Heading', 'dynamic-block' ) }
						value={ heading }
						onChange={ onChangeHeading }
						help={ __(
							'Text to display above the alert box',
							'dynamic-block'
						) }
					/>
				</fieldset>
			</PanelRow>
		) }
		<QueryControls
			{ ...{ order, orderBy } }
			numberOfItems={ postsToShow }
			onOrderChange={ ( value ) =>
				setAttributes( { order: value } )
			}
			onOrderByChange={ ( value ) =>
				setAttributes( { orderBy: value } )
			}
			onNumberOfItemsChange={ ( value ) =>
				setAttributes( { postsToShow: value } )
			}
		/>
	</PanelBody>
</InspectorControls>
In the above code, we have used the QueryControls component. This is a powerful component that allows us to easily modify multiple attributes that are passed to WP_Query. You’ll also need to extract the variables and write the onChangeHeading and toggleHeading functions similar to what we did in the last tutorial.
Step 7: Update the CSS
Finally, you will need to edit the editor.scss and the style.scss files to customise the list output and make it beautiful.
What’s next
We have reached the end of this tutorial. This tutorial has introduced you to building dynamic blocks. Dynamic blocks are easier to build, especially if you choose to use ServerSideRender instead of building a more complicated edit.js file using React.
In the next part of this series, we will explore building dynamic blocks in our plugins.
The code on GitHub
You can view and download the complete code of the Example Dynamic Block on GitHub.


